Privacy Info

Friday, December 2, 2022

Sitecore PowerShell Script - Remove item from Workflow

We came across scenario where we need to remove multiple items from workflow. If items would be less then there would not be any issue but items to be removed were large in number. After some research we decided to create PowerShell to solve this problem. We came up with below script which we ran across folders recursively and remove the items from workflow. To remove items from workflow we need to make Workflow and Workflow State field as blank.

Script

$folderPath = "master:\sitecore\content\Home\TestFolder"

$items = Get-ChildItem -Path $folderPath -Recurse 

foreach($item in $items)
{
	$item.Editing.BeginEdit()
	$item.Fields["__Workflow"].Value = ""
	$item.Fields["__Workflow state"].Value = ""
	$item.Editing.EndEdit() | Out-Null
	Write-Host "Item $($item.name) removed from Workflow"	
}	

Hope you find this blog helpful 😀


Article Referred 

https://www.logicalfeed.com/posts/1194/sitecore-powershell-script-to-remove-update-workflows

Tuesday, October 18, 2022

PowerShell Script - Recycle Application Pool


We sometimes require to recycle the application pool of the websites, to clear cache content or to restart website. Below script comes in handy to do this task. We need to specify user credentials, server name and application pool name. PowerShell script will do the recycling task.

Script

$Username="Username"
$Password="Password"

function RecycleAppPool($Server,$AppPool)
{           
        Write-Host "ServerName:$Server ApplicationPool:$AppPool"

        # Credentials    				
	$Cred = New-Object -TypeName System.Management.Automation.PSCredential -ArgumentList $Username, $Password
				
	# Checking App Pool by name                
        $AppItem = (Invoke-Command $Server -ScriptBlock{param($AppPool) Get-WebAppPoolState | Where-Object {$_.ItemXPath -match "$using:AppPool"} } -ArgumentList $AppPool -Credential $Cred)[0] 
                                 
        If($AppItem -ne $Null)
        {
            try
            {
                # Recycle App Pool
                $Recycle = Invoke-Command $Server -ScriptBlock{param($AppPool)Restart-WebAppPool -name "$using:AppPool"} -ArgumentList $AppPool -Credential $Cred
                Write-Host "Recycle Successful"
            }
            catch
            {
                Write-Host "Error: " -NoNewline -ForegroundColor red
                Write-Host $_.Exception.Message
                Contiune
            }
	}
		    							           
}


RecycleAppPool  "ServerName" "AppPoolName"


You can modify script based on your requirement

Monday, October 17, 2022

Sitecore PowerShell - Merge Layouts


Below script will help you to merge content from layouts. PowerShell script will merge layout from Final to Shared. In the script we need to specify template id for which layouts needs to be merged.

Script

$query = "fast:/sitecore/content//*[@@templateid='{CC44DB9D-1111-4E8E-9D84-080CD8895C77}']"
Get-Item -Path "master:" -Query $query | Merge-Layout


You can customize the script as per your requirement and use it. 

Hope this information is useful to you.

Sunday, October 16, 2022

PowerShell Script - CPU and Storage Details


Manually checking Storage consumption and CPU usage multiple time is very repetitive and boring task. Also if you want to check same details on remote servers then it will again consume lot of time. PowerShell help us to automate this process. We need to specify credentials, name of the server in the script and it will provide storage consumption and CPU utilization details.

Script 

PowerShell Script

$MyDir = Split-Path -Parent $MyInvocation.MyCommand.Path
[xml]$ConfigFile = Get-Content "$MyDir\Settings.xml"


function GetCPUStorageDetails($serverName)
{
    $Username = $ConfigFile.Settings.CredentialsSettings.Username;
    $Password = ConvertTo-SecureString -String $ConfigFile.Settings.CredentialsSettings.Password -AsPlainText -Force   		
    $Cred = New-Object -TypeName System.Management.Automation.PSCredential -ArgumentList $Username, $Password

     $cpuUsage = Get-WmiObject Win32_Processor -ComputerName $serverName -Credential $Cred
     Write-Host ({0}% -f $cpuUsage.LoadPercentage )

     $storageDetails = Get-WmiObject -Class win32_logicaldisk -ComputerName $serverName -Credential $Cred

      foreach ($storageDetail in $storageDetails) {
        #Device ID | FreeSpace
        Write-Host -NoNewline ({0} {1}GB   -f  $storageDetail.DeviceId,([math]::Round($storageDetail.FreeSpace/1GB,2)) )   
     }

     Write-Host ""
}

GetCPUStorageDetails("ServerName")


Settings.xml

<?xml version="1.0"?>
<Settings>
	<CredentialsSettings>
		<Username>Username</Username>
		<Password>Password</Password>
	</CredentialsSettings>
</Settings>


Hope you find this information useful.


Saturday, October 15, 2022

Sitecore PowerShell Script - Item Creation from API


This post describes how can you convert API response from URL to Sitecore item. We need to specify folder item path, Template ID and API URL. After running the script items will be created with API details. Also create template with id, userid, title and completed field and specify template ID for this new template in $templateID variable.  

Script

$itemPath="master:\content\home\DemoTestFolder"
$templateID="{46F57F90-B447-4E8A-8CA1-69B1AD08ACD2}" 
$ApiUrl = "https://jsonplaceholder.typicode.com/todos" 

$response = Invoke-RestMethod -Uri $ApiUrl -Method Get -ContentType "application/json";

foreach ($row in $response)
{
    if (-not ([string]::IsNullOrEmpty($row.id)))
    {
	    $itemName = $row.id

	    #Create Item
	    $newItem = New-Item -Path $itemPath -Name $itemName -ItemType $templateID;

	    #Add values in fields
            $newItem.Editing.BeginEdit()
	    $newItem["id"] = $row.id
	    $newItem["userId"] = $row.userId
	    $newItem["title"] = $row.title
	    $newItem["completed"] = $row.completed
	    $newItem.Editing.EndEdit()

    	Write-Host "Item Created: " $itemName 
    }
}

API URL Reference: https://jsonplaceholder.typicode.com


Hope you find this information useful.

Sitecore PowerShell Script - Creating Multiple Language Versions


We have received request for creating multiple language versions for multiple items. Manually creating language version for each item is cumbersome task. Also we require to delete the existing language versions. To solve this problem we came up with this PowerShell script where we need to specify item path and language versions we need to create. and script will perform the task First script will delete all the existing item versions and then create new item versions specified.

Script
function LanguageVersionsOperations($LanguageItemInfo)
{
	#Spliting the Input
	$SplitDetails=$LanguageItemInfo.Split(";")
	
	#Path of the item
	$itemPath=$SplitDetails[0]
	
	#Item Details from Get-Item  method
	$itemGetInfo= Get-Item $itemPath

	#Deleting All versions except English
	foreach ($version in $itemGetInfo.Versions.GetVersions($true))
	{
        if ($version.Language -ne "en")
		{
			Remove-ItemVersion $version
			Write-Host $version.DisplayName " - " $version.ID " - " $version.Language "- deleted"
		}
	}  
	
	#Adding Versions 
	for($i = 1; $i -lt $SplitDetails.Length; $i++)
	{	    	    
		$itemInfo = Get-Item $itemPath  | Add-ItemLanguage -Language "en" -TargetLanguage $SplitDetails[$i] -IfExist OverwriteLatest
		Write-Host $itemInfo.DisplayName " - " $itemInfo.ID " - " $SplitDetails[$i]  "- added"				
	}
}


$Items ="master:\sitecore\content\Home\TestItem1;en-US;en-CA;fr-CA;zh-CN;en-AU",
	"master:\sitecore\content\Home\TestItem2;en-US;en-CA;fr-CA;en-IN;es-AR",
	"master:\sitecore\content\Home\TestItem3;en-US;en-CA;fr-CA;en-IN;es-AR",
	"master:\sitecore\content\Home\TestItem4;en-US;en-CA;fr-CA;zh-CN;en-AU"	


foreach ($Item in $Items)
{
	Write-Host "Start Operation $((Get-Date).ToString())"
	LanguageVersionsOperations $Item
	Write-Host "End Operation $((Get-Date).ToString())"

}


You can modify above script as per your need and use it.

Hope you find this information useful.


Thursday, October 13, 2022

Sitecore PowerShell Script - Item Creation from CSV file


Creation of multiple items and adding the content to it sometime becomes time consuming. Especially when you have large amount of data to be added in CMS from Excel (CSV) file. We also faced similar challenge where we need to create multiple items and added details to it from CSV file. It was a repetitive and time consuming task for us. For this obstacle we came up with Sitecore PowerShell script which will do this task for us. We just need to specify the location of path where we want to create items, Template ID and CSV file location. Sitecore PowerShell Script will run and create the items as per CSV file details.

Steps

Create CSV file and add details to it as shown below 


Configure settings as per your requirement and run below PowerShell script in PowerShell script window.

Script
$itemPath="master:\content\home\TestFolder" #Location where items are created
$templateID="{0087B3DC-A60A-4C46-B510-2A3A8F7C4D36}" #Template from items are created
$importCSVPath = "C:\DemoImportFile.csv" #CSV file path

#Import data from CSV file
$importRows = Import-CSV $importCSVPath 

New-UsingBlock (New-Object Sitecore.Data.BulkUpdateContext) {
	foreach ($row in $importRows)
	{
		$itemName = $row.Field1

		#Create Item
		$newItem = New-Item -Path $itemPath -Name $itemName -ItemType $templateID;

		#Add values in fields
		$newItem.Editing.BeginEdit()
		$newItem["Field1"] = $row.Field1
		$newItem["Field2"] = $row.Field2
		$newItem["Field3"] = $row.Field3
		$newItem["Field4"] = $row.Field4	 		 	 
		$newItem.Editing.EndEdit()

		Write-Host "Item Created: " $itemName 
	}
}


After script execution is successful items will be created in Content tree with CSV file details

Item Details


Folder Structure


Hope you find this information useful.


References


Website Pages Checker - Console Application


It is difficult to check and test pages of website manually one by one if pages count is huge. There are some limitations with automation testing of websites. We cannot check whether UI is meet as per expectation or is there any content issue with website with automation testing. To solve this problem we came up with hybrid solution - Website Pages Checker. In this application we need to specify the websites URL's that we require to check and then run the application. The application will visit each page specified in the list, automatically scroll till end of the page and it will ask whether page is present as per requirement. This application saved our huge amount of time avoiding manually entering URL's in browser and specifying whether they are working or not in excel sheet. Please refer below steps to create this console application.

Step 1: Create Console Application in Visual Studio
Step 2: Install below Nugget Packages for the project.

  • log4net
  • Newtonsoft.Json
  • Selenium.WebDriver

Step 3: Check chrome browser version and download chrome driver from below location


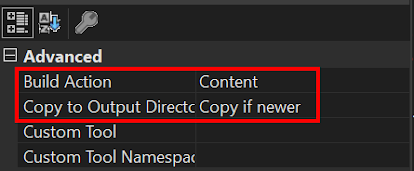
Step 4: Add chromedriver in the project and set build properties as shown below


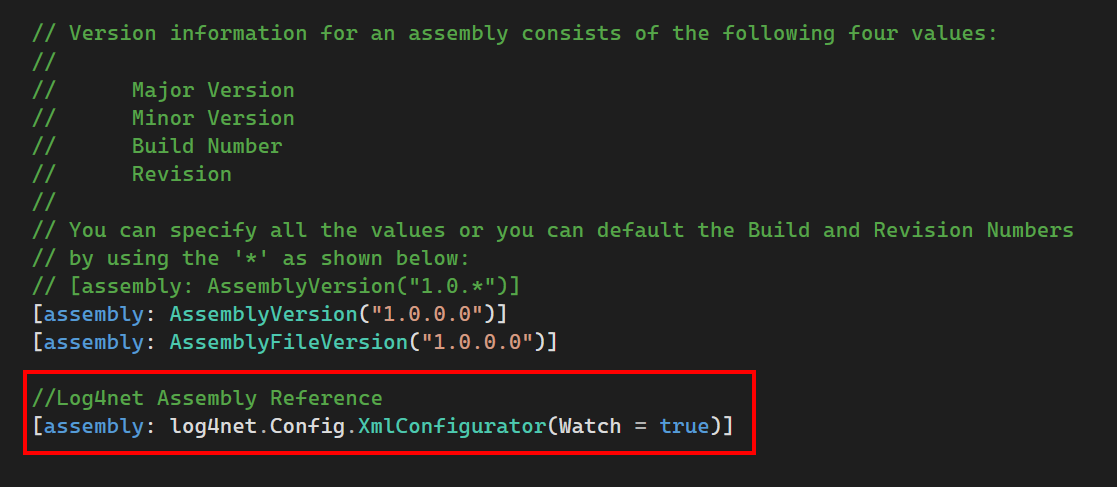
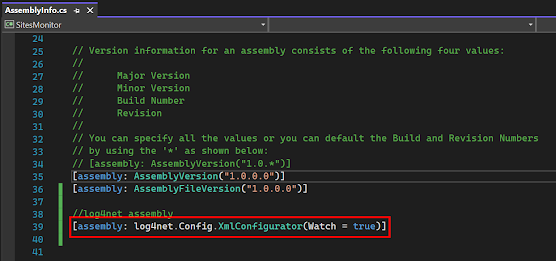
Step 5: Add changes in  AssemblyInfo.cs file


Code
[assembly: log4net.Config.XmlConfigurator(Watch = true)]


Step 6: Add below change in App.config file

Code
<?xml version="1.0" encoding="utf-8" ?>
<configuration>
	<!-- Log4net Logging Setup Start-->
	<configSections>
		<section name="log4net" type="log4net.Config.Log4NetConfigurationSectionHandler,log4net, Version=1.2.10.0, Culture=neutral, PublicKeyToken=1b44e1d426115821" />
	</configSections>
	<log4net>		
		<appender name="console" type="log4net.Appender.ConsoleAppender">
			<layout type="log4net.Layout.PatternLayout">
				<conversionPattern value="%date %level - %message%newline" />
			</layout>
		</appender>
		<appender name="file1" type="log4net.Appender.RollingFileAppender">
			<file type="log4net.Util.PatternString" value="Logs\log_%date{yyyy.MM.dd_HH.mm.ss}.log" />
			<lockingModel type="log4net.Appender.FileAppender+MinimalLock"/>
			<appendToFile value="true" />
			<rollingStyle value="Once" />
			<maxSizeRollBackups value="5" />
			<staticLogFileName value="false" />
			<maximumFileSize value="10MB" />
			<layout type="log4net.Layout.PatternLayout">
				<conversionPattern value="%date %level - %message%newline" />
			</layout>
		</appender>
		<appender name="file2" type="log4net.Appender.RollingFileAppender">
			<file type="log4net.Util.PatternString" value="Logs\PagesDetails_%date{yyyy.MM.dd_HH.mm.ss}.log" />
			<lockingModel type="log4net.Appender.FileAppender+MinimalLock"/>
			<appendToFile value="true" />
			<rollingStyle value="Once" />
			<maxSizeRollBackups value="5" />
			<staticLogFileName value="false" />
			<maximumFileSize value="10MB" />
			<layout type="log4net.Layout.PatternLayout">
				<conversionPattern value="%message%newline" />
			</layout>
		</appender>
		<root>
			<level value="ALL" />
			<appender-ref ref="console" />
		</root>
		<logger name="File1">
			<level value="All"/>
			<appender-ref ref="file1"/>
		</logger>
		<logger name="File2">
			<level value="All"/>
			<appender-ref ref="file2"/>
		</logger>
	</log4net>
	<!-- Log4net Logging Setup End-->
    <startup> 
        <supportedRuntime version="v4.0" sku=".NETFramework,Version=v4.8" />
    </startup>
	<appSettings>
		<add key="UrlsFilePath" value="Urls.json"/>
	</appSettings>
</configuration>


Step 7: Create Log Folder in application and set build action as shown below.


Step 8: Create Logger.cs class file and and below code 

Code

namespace WebsitePagesChecker
{
    public static class Logger
    {
        public static readonly log4net.ILog Log = log4net.LogManager.GetLogger("File1");
        public static readonly log4net.ILog SiteDetailsFile = log4net.LogManager.GetLogger("File2");
    }
}


Step 9: Create JsonUrls.cs class file and add below code

Code
using System;
using System.Collections.Generic;

namespace WebsitePagesChecker
{
    internal class JsonUrls
    {
        public string url { get; set; }

        public static List<JsonUrls> GetSiteUrls()
        {
            List<JsonUrls> URLS = new List<JsonUrls>();
            try
            {
                string UrlsFilePath = System.Configuration.ConfigurationManager.AppSettings["UrlsFilePath"].ToString();

                //Getting URLS from Json File
                string json = System.IO.File.ReadAllText(UrlsFilePath);
                URLS = Newtonsoft.Json.JsonConvert.DeserializeObject<List<JsonUrls>>(json);

            }
            catch (Exception ex)
            {
                Logger.Log.Error(String.Format("{0}  Exception {1}", DateTime.Now, ex));
            }

            return URLS;
        }
    }
}


Step 10: Create Urls.json and add below code

Code
[
  {
    "url": "https://www.google.com"
  },
  {
    "url": "https://www.amazon.com"
  },
  {
    "url": "https://www.flipkart.com"
  },
  {
    "url": "https://www.youtube.com"
  },
  {
    "url": "https://bookmyshow.com"
  }
]


Step 11: Change build action of Urls.json as shown below


Step 12: Create Drivers.cs Class file and add below code

Code
using OpenQA.Selenium;
using OpenQA.Selenium.Chrome;

namespace WebsitePagesChecker
{
    internal class Drivers
    {
        protected static IWebDriver SetupChromeDriver()
        {
            ChromeOptions options = new ChromeOptions();
            options.AddArgument("--log-level=3");// Hides log errors/warnings
            IWebDriver driver = new ChromeDriver();

            driver.Manage().Window.Maximize();
            return driver;
        }

        protected static void CloseExitDrivers(IWebDriver driver)
        {
            driver.Close();
            driver.Quit();
        }
    }
}


Step 13: Create TestCases.cs class file and add below code

Code
using OpenQA.Selenium;
using System;
using System.Collections.Generic;

namespace WebsitePagesChecker
{
    internal class TestCases:Drivers
    {
        public static void CheckWebsitePages()
        {
            try
            {
                IWebDriver driver = SetupChromeDriver();
                List<JsonUrls> URLS = JsonUrls.GetSiteUrls();

                Logger.SiteDetailsFile.Info(String.Format("Total URLS:{0}", URLS.Count));

                foreach (var URL in URLS)
                {
                    string script = "var i = 10; var int = setInterval(function() { window.scrollTo(0, i); i += 10; if (i >= 3000) clearInterval(int);}, 20);";//to increase speed increase values of i 
                    driver.Navigate().GoToUrl(URL.url);
                    IJavaScriptExecutor js = driver as IJavaScriptExecutor;
                    js.ExecuteScript(script);

                    Console.Write("\nPage is Ok? Yes (y) or No (n):");
                    char userChoice = Console.ReadKey().KeyChar;
                    Logger.SiteDetailsFile.Info(String.Format("{0} Page:{1} Result:{2}", DateTime.Now, URL.url, userChoice.ToString().ToUpper()));                   
                }                

                CloseExitDrivers(driver);

            }
            catch (Exception ex)
            {
                Logger.Log.Error(String.Format("Exception: {0}",ex.ToString()));
            }
        }
    }
}


Step 14: Add below code in Program.cs file

Code
using System;

namespace WebsitePagesChecker
{
    internal class Program
    {
        static void Main(string[] args)
        {
            StartApplication();
        }

        private static void StartApplication()
        {
            Logger.Log.Info(String.Format("Application Start {0}", DateTime.Now));
            TestCases.CheckWebsitePages();                        
            Logger.Log.Info(String.Format("Application End {0}", DateTime.Now));            
            Console.ReadKey();
        }
    }    
}


Step 15: Your applications is ready you can run the applications and test the Urls.


Finally output of the file will be something like this


Thank you for reading the post 😀

Tuesday, October 11, 2022

PowerShell Script - Website Certificate Information


It is difficult to manage the certificates for websites. When websites hosted on server are large in number task become more tedious and complicated. We have also received similar task for collecting  details of certificates for each website on remote server. In our case websites hosted on server were large in number and manually collecting the details for the certificates was time consuming task. So we came up with below PowerShell script which will help us to provide the details.

Script  

Import-Module -Name WebAdministration


Get-ChildItem -Path IIS:SSLBindings | ForEach-Object -Process `
{
    if ($_.Sites)
    {
        $certificate = Get-ChildItem -Path CERT:LocalMachine/My | Where-Object -Property Thumbprint -EQ -Value $_.Thumbprint       

        [PsCustomObject]@{
            Sites                        = $_.Sites.Value
            CertificateFriendlyName      = $certificate.FriendlyName                     
            CertificateIssuer            = $certificate.Issuer
            ExpiryDate                   = [string]$certificate.NotAfter            
        }
    }
} | ConvertTo-Json  | Out-File -Width 4096 C:\ServerCertDetails.json -Append 

Above script will provide details of fields for each website hosted on server.

  • Website Name
  • Certificate Name
  • Certificate Issuer
  • Certificate Expiry Date
You can customize display details as per your requirement. It will convert the details into json file and save it in specified location.


ServerCertDetails.json


Hope you find this information useful.
  

Monday, October 10, 2022

Failed to Start Sitecore Marketing Automation Engine Service


While installing Sitecore 9.3 we encountered below error for marketing automation service.

[Error] Failed to start the Marketing Automation Engine service.
System.InvalidOperationException: This configuration has not been initialized. Please call the initialize method before using it.

[Error] Error initializing XConnect client.
System.AggregateException: One or more errors occurred. -> Sitecore.XConnect.XdbCollectionUnavailableException: An error occurred while sending the request. > System.Net.Http.HttpRequestException: An error occurred while sending the request.


We tried to manually restart the service but it failed and displayed below error.


After searching from multiple sources we got the solution which worked for us.
Steps:
  1. Open PowerShell window in Administrator mode
  2. Run below two commands
Get-Childitem cert:\LocalMachine\root -Recurse | Where-Object {$.Issuer -ne $.Subject}

Get-Childitem cert:\LocalMachine\root -Recurse | Where-Object {$.Issuer -ne $.Subject} | Move-Item -Destination Cert:\LocalMachine\CA


First command will check for non-self signed certificates and second command will add those certificates to Intermediate certification authorities store.
After running above commands service started running.

Note: Please wait for certain duration and then restart the service if it fails to restart immediately.


Also refer below links for more information.


Hope you find this post helpful.😀


Sunday, October 9, 2022

Website Monitor - Console Application


Monitoring whether websites are working fine are not is very difficult task. Especially manually checking the sites is practically impossible. To solve this problem I discovered solution Website Monitor. It is ASP.NET Console Application which will check whether application is up and running if not it will log the error. This post will explain you how can you create this application.

1. Create Console Application in Visual Studio

2. Install below two Nugget package for your project

    log4net


    Newtonsoft.Json


3. Add Reference for log4net in AssemblyInfo.cs file 


Code

[assembly: log4net.Config.XmlConfigurator(Watch = true)]


4. Add below code in App.config file

Code

<?xml version="1.0" encoding="utf-8" ?>
<configuration>
	<configSections>
		<section name="log4net" type="log4net.Config.Log4NetConfigurationSectionHandler,log4net, Version=1.2.10.0, Culture=neutral, PublicKeyToken=1b44e1d426115821" />
	</configSections>
	<!-- Log4net Logging Setup Start -->
	<log4net>
		<root>
			<level value="ALL" />
			<appender-ref ref="console" />
			<appender-ref ref="file" />
		</root>
		<appender name="console" type="log4net.Appender.ConsoleAppender">
			<layout type="log4net.Layout.PatternLayout">
				<conversionPattern value="%date %level - %message%newline" />
			</layout>
		</appender>
		<appender name="file" type="log4net.Appender.RollingFileAppender">
			<file type="log4net.Util.PatternString" value="Logs/WebsiteMonitor_%date{yyyy.MM.dd_HH.mm.ss}.log" />
			<appendToFile value="true" />
			<rollingStyle value="Once" />
			<maxSizeRollBackups value="5" />
			<staticLogFileName value="false" />
			<maximumFileSize value="10MB" />
			<layout type="log4net.Layout.PatternLayout">
				<conversionPattern value="%date %level - %message%newline" />
			</layout>
		</appender>
	</log4net>
	<!-- Log4net Logging Setup End -->
	<startup> 
        <supportedRuntime version="v4.0" sku=".NETFramework,Version=v4.8" />
    </startup>
	<appSettings>
		<add key="UrlsFilePath" value="Urls.json"/>
	</appSettings>
</configuration>

Note: You can change log4net configurations as per your requirement.

5. Create Logs folder in the application and set below actions.


6. Create Logger.cs file and add below code.

Code

namespace SitesMonitor
{
    public static class Logger
    {
        public static readonly log4net.ILog Log = log4net.LogManager.GetLogger(System.Reflection.MethodBase.GetCurrentMethod().DeclaringType);
    }
}


7. Create Urls.json file and add below code.

Code

[
  {
    "url": "https://www.google.com"
  },
  {
    "url": "https://www.amazon.com"
  },
  {
    "url": "https://www.flipkart.com"
  },
  {
    "url": "https://www.youtube.com"
  },
  {
    "url": "https://bookmyshow.com"
  }
]

8. Change Build Actions of Urls.json as shown below


9. Create JsonUrls.cs file and add below code

Code

using System;
using System.Collections.Generic;

namespace SitesMonitor
{
    public  class JsonUrls
    {
        public string url { get; set; }

        public static List<JsonUrls> GetSiteUrls()
        {
            List<JsonUrls> URLS = new List<JsonUrls>();
            try
            {
                string UrlsFilePath = System.Configuration.ConfigurationManager.AppSettings["UrlsFilePath"].ToString();

                //Getting URLS from Json File
                string json = System.IO.File.ReadAllText(UrlsFilePath);
                URLS = Newtonsoft.Json.JsonConvert.DeserializeObject<List<JsonUrls>>(json);

            }
            catch (Exception ex)
            {
                Logger.Log.Error(String.Format("{0}  Exception {1}", DateTime.Now, ex));
            }

            return URLS;
        }
    }
}


10. Add below Code in Program.cs file

Code

using System;
using System.Collections.Generic;
using System.Net;

namespace SitesMonitor
{
    internal class Program
    {
        static void Main(string[] args)
        {
            StartApplication();
        }

        private static void StartApplication()
        {
            try
            {
                Logger.Log.Info(String.Format("Execution Started {0}", DateTime.Now));
List<JsonUrls> URLS = JsonUrls.GetSiteUrls(); foreach (var URL in URLS) { string url = URL.url; WebRequest request = WebRequest.Create(url); try { HttpWebResponse response = (HttpWebResponse)request.GetResponse(); if (response != null || response.StatusCode == HttpStatusCode.OK) { //Website is working fine Logger.Log.Info(String.Format("{0} URL:{1} Status Code:{2} Status Description:{3}", DateTime.Now, url, response.StatusCode, response.StatusDescription)); } else { //Error occured for website Logger.Log.Info(String.Format("{0} URL:{1} Status Code:{2} Status Description:{3}", DateTime.Now, url, response.StatusCode, response.StatusDescription)); } } catch (Exception ex) { Logger.Log.Error(String.Format("{0} URL:{1} Exception {2}", DateTime.Now, url, ex)); } } } catch (Exception ex) { Logger.Log.Error(String.Format("{0} Exception {1}", DateTime.Now, ex)); } finally { Logger.Log.Info(String.Format("Execution Completed {0}", DateTime.Now)); Console.ReadLine(); } } } }


Finally you Solution will look like this.


Console Output


Log File


Your Console Application is ready for use. You can also deploy this console application in Windows Task scheduler and it will run after certain duration. Also, you can configure Email/SMS alerts whenever site is down.


Hope you find this information useful. 😀


Sitecore PowerShell Script - Remove item from Workflow

We came across scenario where we need to remove multiple items from workflow. If items would be less then there would not be any issue but i...